


MUSIC 101
How to Set Up your Drum Kit
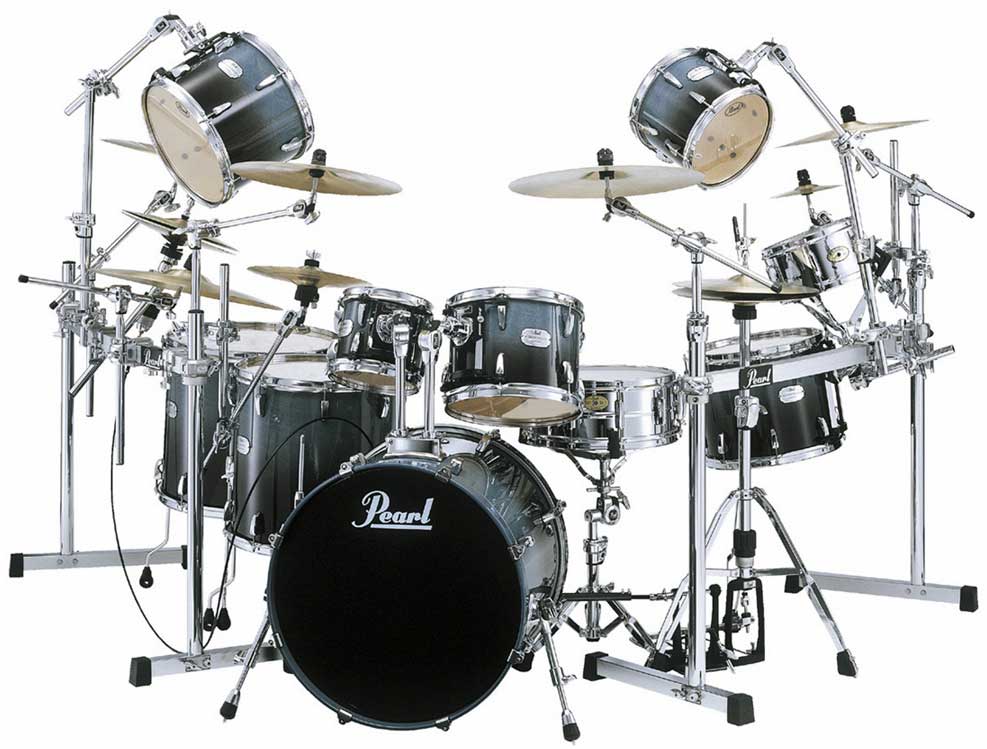
Building from a Shell Pack
Most kits bought today are sent by mail, and are therefore "flat-packed", which means that you have to build the kit yourself once it arrives. This is quite a straight forward exercise (certainly more simple than building some cabinets from Ikea), and the instructions are normally very useful, so it is definitely worth reading through them.
I build kits from the bottom up, so start with the bass drum and work from there. This is good practice as you generally set your kit up around where the bass drum is, and it also gets the biggest things out of the way first, as you don't really want to have to move them too much later.
The Bass Drum
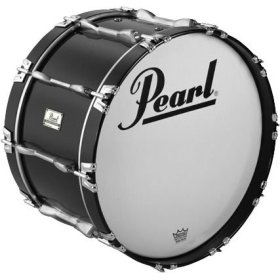
It is easier to build drums when they are flat on the floor, so to fit the front skin (the normally weaker skin facing the audience) onto your bass drum first, lay your bass drum shell down flat and place the skin over the drum. Then place the rim or frame over the skin and simply drop the screws into their relevant holes, without screwing them in at this stage. Once all of this is in place, then you can start tightening the skin by turning the screws a half turn, tightening opposite screws one after another. Try and keep the tension across the whole drum-head even, as this will get the best sound, although how tight you would like the head depends on what size bass drum you have, and also your personal taste. Although if you tighten the skin too much, it may become so stretched that a tare is very likely.
You may notice that some front skins have holes in them, while others are complete. This also affects the tone of the drum, and many drummers who use a complete skin on the bass drum, often add some kind of padding, such as blankets, to the inside of the drum in order to deaden the sound and reduce the resonation of the sound. This is the time to add any padding you may want to use, as replacing bass drum heads is quite a hassle with a full kit set-up.
Once you have the front head the tightness that you like it, then turn the drum over and follow the same steps on the other skin, beating the drum after you have tightened all the screws each time in order to find the sound and tone that you are after. The pitch of the sound will become higher with each half turn, although please note that drum heads which are either too loose or too tight do have a tendency to rip, so be careful. When you are happy with the tone of the drum, then stand the drum up and add the supports, which are normally in the form of two spikes on either side of the drum which stops it sliding forward or tipping side to side when playing.
The Toms
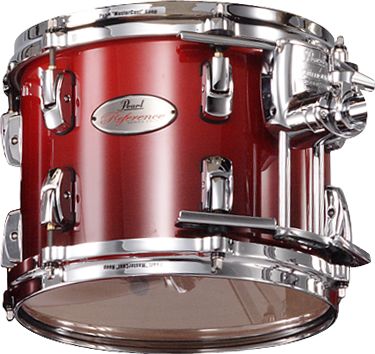 Setting up the toms is a very similar process to setting up the bass drum, just on a smaller scale. You again have a tougher skin for the playing surface, with a weaker one for the underside. I tend to go from the smallest tom to the floor tom, although you can do these in any order. You go through the process of laying the drum flat and adding the skins, and tightening them by half turns until you are happy with the tone and pitch, testing the sound with a drum stick between each tightening.
Once you are happy how the toms sound then the next stage is to add them to your kit. Most kits come with two mounted toms and one floor standing tom. The floor tom tends to have three poles which can be easily slid into their fittings on the drum, and then the angle and height off the floor can be easily adjusted. The mounted toms are slightly different as they get mounted on top of the bass drum by fittings which vary between manufacturers. Some manufacturers such as Pearl use bar fittings, while other such as Yamaha use ball fittings, however both are about equally good, and setting them up is a similar process. There will be a central fitting which actually slides into the bass drum, and needs to be screwed firmly in place, and it is from this fitting that the toms are attached, either by getting the balls or the grips to the right angle, and then again screwing firmly into place. For a right handed drummer, the smallest tom will normally be on the left hand side for the drummer, with the larger on the right, and the floor tom placed to the right of the bass drum in an arc shape.
The Snare Drum

The first part of setting up the snare drum is very similar to that of the toms and the bass drum in that you lay it flat and tighten the head very slowly until you find the right pitch. However, there is also a set of springs that have to be attached beneath the snare drum, which give it its distinctive sound. To attach them, there is normally some form of material at either end of set of springs, which has to be threaded through an attachment at each side of the snare drum, and then screwed into place. Nevertheless, the set of springs also has to be tuned and tightened which is done by a wheel type fixing on the snare drum. In order to test how tight you would like the springs, which rattle less and are more staccato the more tight they get, you must first use the lever on the side of the drum to pull the springs onto the drum. You tighten the springs to personal taste, continually beating the drum with a drum stick to test the sound.
Now, unlike the toms, the snare drum has its own stand, which you need to slide together (as it normally comes in only one or two pieces), spread its legs on the floor to create a stable base, and then spread the arms in order for it to firmly hold the snare drum. Once, you have set up the snare drum and its stand; place them into your kit, which is normally to the left of your bass drum in the arc for a right-handed player.
Hi-Hats and Pedals
 These are perhaps the most complicated parts of a drum kit to assemble, in that they have the most parts to fit together. However, if you follow the instructions, they should be pretty simple to put together.
If you start with the bass drum pedal, all you have to do is tightly screw the actual beater onto the pedal mechanism using a drum key, and then attach the springs to make the mechanism responsive. This is a slightly different process with each manufacturer, and I won’t try to explain all of them in detail, but that is the main part of the assembly. The next stage is actually attaching the pedal to the bass drum, so that they will stay together, for which there is a type of "alligator grip" which you slide over the rim of the bass drum, and then screw down tightly.
The assembly of the hi-hats pedal is similar, although instead of attaching the beater to the pedal, you attach the rods which will control the actual cymbals, and clip its bas onto that of the hi-hat stand. Other than that, both pedals are pretty much the same. You then need to spread the legs of the stand to make a solid base, and adjust the height of the stand so that it is comfortable for you to play.
 At the top of the stand you should place a plastic cap, and then some padding, so that the cymbal will not hit the stand directly, and then place the bottom of the two hi-hats on top of the padding, left loose and not screwed to anything. The next step is to attach the top hi-hat to its fittings. You do this by threading the tall screw through some padding, and then through the cymbal itself. Then turn the cymbal over upside down, and thread the bottom part of the tall screw through another piece of padding on the other side, and then finally through a nut which you should screw up until it is high enough for the cymbal to be held in place, although loosely so that the cymbal may vibrate quite wildly. You should turn the cymbal back the right way round and then thread it over the rod coming through the top of the hi-hat stand. It is then a simple measure of pressing down the foot pedal, and as you do that, screwing the top hi-hat onto the rod tightly. Then when you release the pedal, the top hi-hat should rise as the pedal does. All that is left to be done with the high-hats after this assembly is to place it into your kit, which would be to the left of the snare drum following the arc for a right handed player.
Cymbals and Stands

The last part that you need to add to you drum kit are the cymbals. Most people use a crash cymbal and a ride cymbal as the basic two, although you can always add more at a later date. There are generally two types of cymbal stands, the "Boom-stand" and the normal stand, and in this set-up we will use one of each.
If we set up the crash cymbal first, we need to set up the normal stand. For this, all that you need to do, is spread the legs of the stand to create a stable base, adjust the stand to the right height, and then angle the top of the stand to the angle you would like your crash cymbal to be at. Once you have done this, slide a plastic cap over the tip of the stand, followed by some padding. Having done this, simply place your crash cymbal over the padding, place some more padding over it, and loosely fasten with a wing-nut.
Setting up a boom stand for your ride cymbal is very similar, although after spreading the legs and correcting the height, you are able to change the angle of the middle of the stand so that it leans more over your kit, and then again adjust the angle of the head. Once you have done this, and tightened it all so that it is secure, you need to follow the same steps of adding the cymbal, of a plastic cap, then some padding, then the cymbal, then some more padding, and all loosely fastened together with a wing-nut. Where you put these cymbals is up to you, although in a standard set-up, the crash cymbal will be behind your snare drum, with the ride cymbal in the corner next to your bass drum and behind the floor tom.
Final Touches
If you have followed this article all the way through from start to finish, then you should have a full basic drum kit set up for a right handed player. If you are left handed, then you just need to reverse the arc of the drums and cymbals, having the hi-hats and snare on the right, and the floor tom on the left. However, this is just the standard set-up, and many drummers use variations on this. The most important thing is for the kit to be set up in a way that is comfortable for you to play.

LIKE THIS POST? SHARE THIS TO
![]()
![]()
![]()
![]()
![]()
![]()
![]()
![]()
Tags: drum set, drums, music
 Previous Article

Subscribe to:
Post Comments (Atom)


Share your views...
4 Respones to "MUSIC 101"
Cool.. I've been thinking of buying a drum set..
March 22, 2011 at 10:21 PM
I like to have one but got no talent for it.. Too Bad
May 14, 2011 at 11:11 PM
My brother is the drummer of a popular band in Davao (sorry, can't disclose), so I'm def gonna share this with him. Will definitely find something useful here. Thank you for sharing!
July 1, 2011 at 5:07 AM
Setting up our drum kit is the most cumbersome task.We have to place everything in perfect position so that it doesn't affect our beat and anything related to music.Its very impressive that you helped us through this article.
January 12, 2012 at 5:06 AM
Post a Comment
This is a do-follow blog and is updated regularly.
■ Avoid posting non related contents.
■ Please use a name instead of blog name or SEO stuff, otherwise it will be deleted right away